Preparation
This information has been put together for those that are going to use the exercises on using the MapServer software to serve data according to Open Geospatial Consortium's OWS standards, in the setting of the ITC face-to-face courses. You will use the ITC internal server at https://gisedu.itc.utwente.nl for serving the data and services. (Other versions of these exercises are availlbale for use in others settings, ask your teacher).
Creating an account on the Web Server
You have to create an account and website directory on the server only once!. If you have done this for earlier exercises already, you do not have to repeat it, just skip to Step 5.
Before you can do anything that involves dynamic web pages, client-side
scripting or server-side applications, you will have to make sure you have a web site to test and
serve your content. There are many ways to get access to such a web server; for ITC students the
simplest is to use the ITC internal server at https://gisedu.itc.utwente.nl. Below we
will explain how to initiate your account on this server.
Open a web browser and go to the site https://gisedu.itc.utwente.nl/manage.
Fill in any details asked for and do not forget to press "OK". This will create a special directory
on the server, this directory will be served as webpages by a Web Server, and its web address will
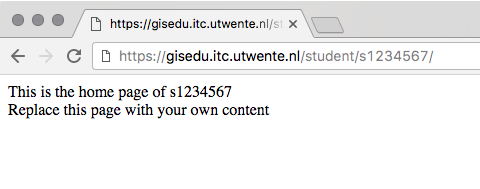
be https://gisedu.itc.utwente.nl/student/s1234567, where s1234567 will be
replaced by your s-number.
Test the site by starting any web browser and typing in the web address mentioned above. You should see a webpage similar to the one below:
You can also access this directory using your computer's file system (through the so-called UNC file
path, that is not using the Web): \\gisedu.itc.utwente.nl\student\s1234567 (again
replacing the s1234567 with your login) --- on Linux and Mac OSX machines, you use
forward slashes / instead of backslashes \)
.
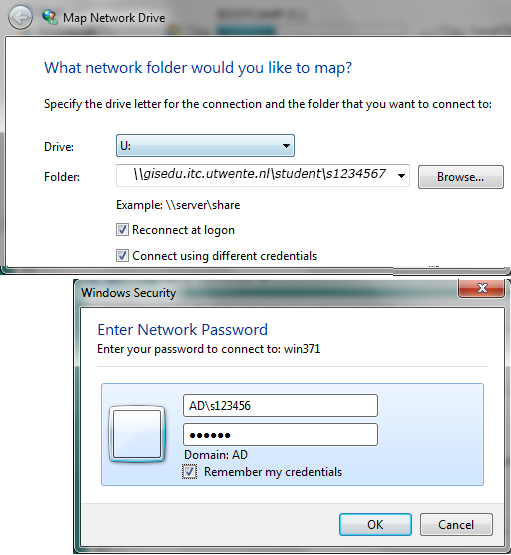
When using a Windows computer, the easiest way to work with this directory is to create a so-called
Mapped Network Drive:
In My Computer find the Map Network Drive menu. Choose an
unused drive letter (e.g. U:) and add the UNC file path mentioned above. Be careful,
you will have to use the option connect using different credentials, and then the
username AD\s1234567 (replacing s1234567 with your login).
Now you can edit the file default.htm in a simple text editor (e.g. NotePad++ on
Windows, available in the ITC Software Manager).
Change the content (e.g. add a welcome message), save it and open again in a web browser. You should
see the changes. This means your website is working and all content you place in this web-enabled
directory will be served by the IIS webserver running on gisedu.itc.utwente.nl.
Installing Files and Data
For this exercise, you will need to install selected data and configuration files for MapServer. The simplest way to do this is to download the ZIP-archive "thailand.zip", and un-zip in the root of the web-site directory you created in section 1 above. This creates a folder structure that should match the one below:
[your web dir]
    |
    |___thailand
          |
          |___configWMS.map [MapServer configuration file]
          |
          |___data
          |     |___naturalearth.tif
          |
          |___fonts
          |     |___fonts [used by MapServer]
          |
          |___lib
          |     |___javascript and css [needed for later exercises]
          |
          |___templates
          |     |___html templates [used by MapServer]
          |
          |___testWMS.html [webform to test your setup]
Setup parameters
The MapServer software is installed on the same intranet server as your web sites. You will place all the MapServer configuration files, templates etc., inside the Web directory you created above. You can use only this location!
The following 3 setup parameters will be needed repeatedly in the following exercises:
[NETPATH] = d:/iishome/student/s1234567/thailand (replace s1234567 with your student login)
[CGIPATH] = https://gisedu.itc.utwente.nl/cgi-bin/mapserv.exe
[URLPATH] = https://gisedu.itc.utwente.nl/student/s1234567/thailand (replace s1234567 with your student login)
The [NETPATH] points to the windows UNC path to your map configuration files (the actual location on the drive), as it can be found by the MapServer CGI. For a student with username "s1234567" who unzipped the data files into the sub-directory thailand, this would be d:/iishome/student/s1234567/thailand, but for you the studentnumber will of course be different!
The [CGIPATH] points to the location where the Webserver can reach the MapServer CGI.
The [URLPATH] points to the web location where a browser can find the output of the MapServer, e.g., temporary image files or HTML templates. This in reality is an alias for the web server that actually points to the [NETPATH] mentioned above.
Now you are all set to start the exercise...
Coding MAP files
In many cases during these exercises, you will have to type code in so-called MAP files (configuration files for MapServer). It's very easy to make mistakes in such code. MAP code is not case-sensitive, but proper use of the syntax is important, especially nesting of commands.
Retyping the code you see in the exercise description is not necessary: You can copy the code from the listings directly. Below in Listing 1 is an example of such a code listing. Make yourself familiar with the tools, especially the copy tool in the title bar... If you see dots [ • • • ] in code fragments, they indicate that there is more code above and/or below the code shown in the snippet. Please DO NOT copy the dots to your files. Additionally, lines with new code are highlighted in yellow. This should give you a reference as to where to implement the changes asked for in the exercise description.
|
1 2 3 4 5 6 7 8 9 10 11 12 13 14 15 16 17 18 19 20 21 22 23 24 25 |
dotdotdot LAYER NAME "forest" TYPE POLYGON STATUS ON CONNECTIONTYPE postgis CONNECTION "user=exercises password=exercises dbname=exercises host=gisedu.itc.utwente.nl port=5434 options='-c client_encoding=UTF8'" DATA "geom FROM thailand.forest USING UNIQUE id USING srid=4326" METADATA "ows_title" "forest" "ows_extent" "97.3 5.6 105.7 20.5" END #layer metadata PROJECTION "init=epsg:4326" END #layer projection CLASS NAME "forest" STYLE OUTLINECOLOR 255 255 255 COLOR 137 205 102 END #style END #class forest END #layer forest END #map |
[NOTE: Never copy from the PDF version of exercise descriptions!]
There are several software tools that can help you: Use a text– editor that is code-aware, e.g. on MacOSX and Linux use TextWrangler or medit, on Windows Notepad++. This will provide you with line numbers, automatic highlighting of recognised keywords, etcetera.
Use a modern web–browser: FireFox, Chrome or Opera, or Internet Explore version 9 or higher. These are HTML5 compatible and have built-in web developer tools. These tools provide error messages, code views and a JavaScript console, network traffic monitoring, etc...